Learn how to purchase and activate an SSL certificate on Trustname to secure your website with HTTPS. This guide walks you through selecting the right SSL certificate, completing domain validation, and finishing the purchase process.
Key Takeaways
- Choose – Select the SSL certificate that best fits your website and security needs.
- Generate – Create or provide a valid CSR to continue the certificate request.
- Validate – Complete domain ownership verification using your preferred method.
- Pay – Review your order and complete the payment securely.
- Activate – Finish the validation process and install the issued SSL certificate on your server.
TABLE OF CONTENTS
Trustname makes it incredibly easy to purchase and install an SSL certificate on your domain name. You don't need the technical know-how to tweak your servers, we do all that for you!
Ready to set up an SSL certificate for your domain on Trustname?
Let's show you how:
- Visit our SSL certificate catalog here.
[+] [Callout] Info Insert title here [+] [Callout] Title/Title with Icon -> Note that to purchase an SSL certificate, you'll need to already have a domain name and have access to the domain registrar account. If you don't have one yet, you can register a new domain with Trustname - the #1 fastest-growing independent domain registrar in 2024!
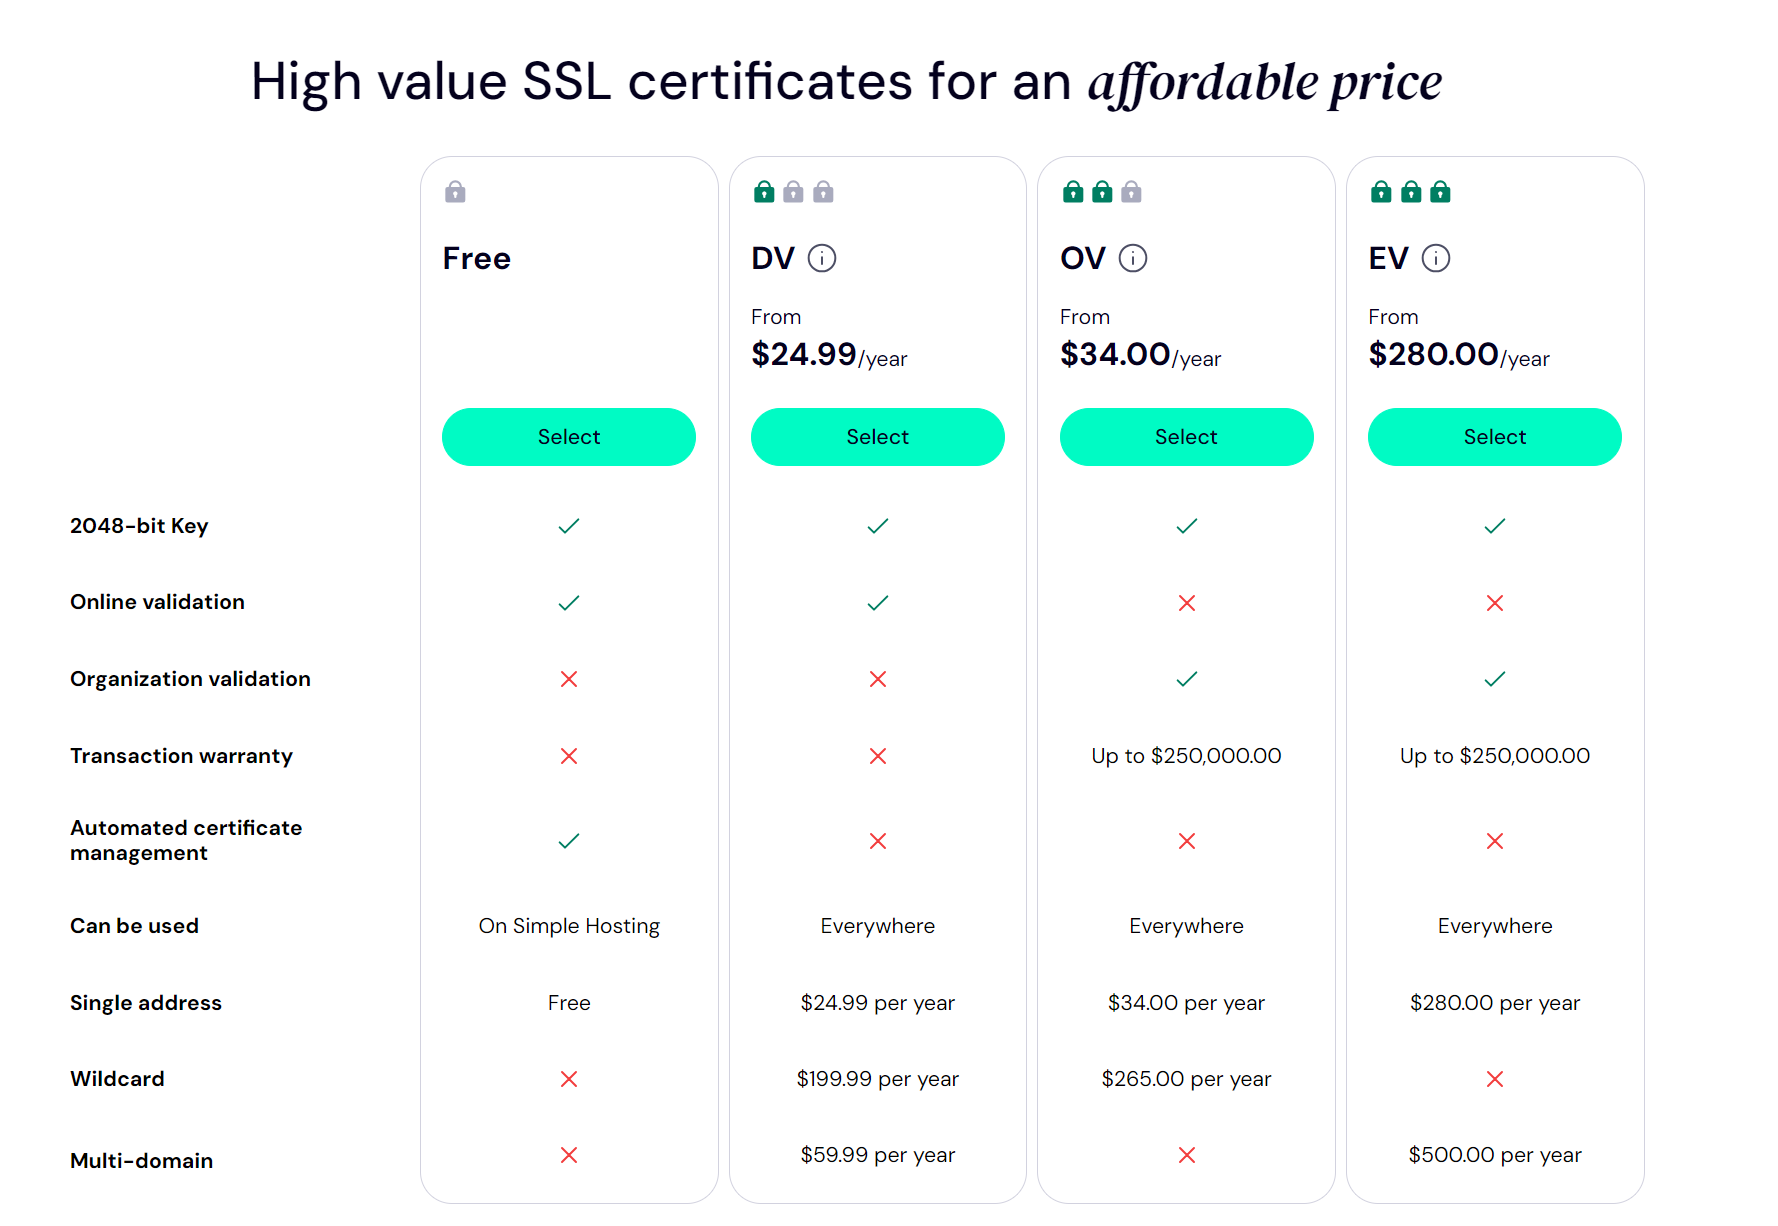
We offer four types of SSL certificates - a free SSL, a DV SSL, an OV SSL, and an EV SSL certificate, catering to single-domain websites, domains with multiple subdomains (wildcard), and multi-domain coverage. When you register a domain name on our platform, you get a free SSL installed automatically.
- Now, you know how to choose. Our DV SSL certificate starts at $1.5 per month for a single address, our OV SSL certificate at $2.8 per month, and our EV SSL certificate at $23 per month for unparalleled security.
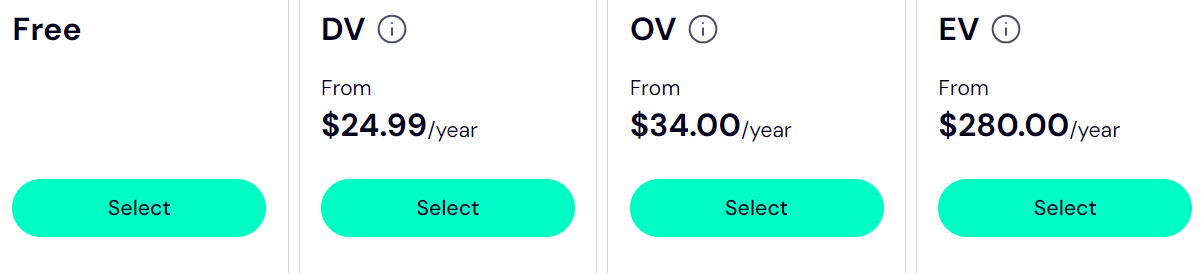
Once you've decided on the SSL certificate for you based on your type of website, number of subdomains, and whether you are protecting one domain name or multiple domains, click 'Select'.
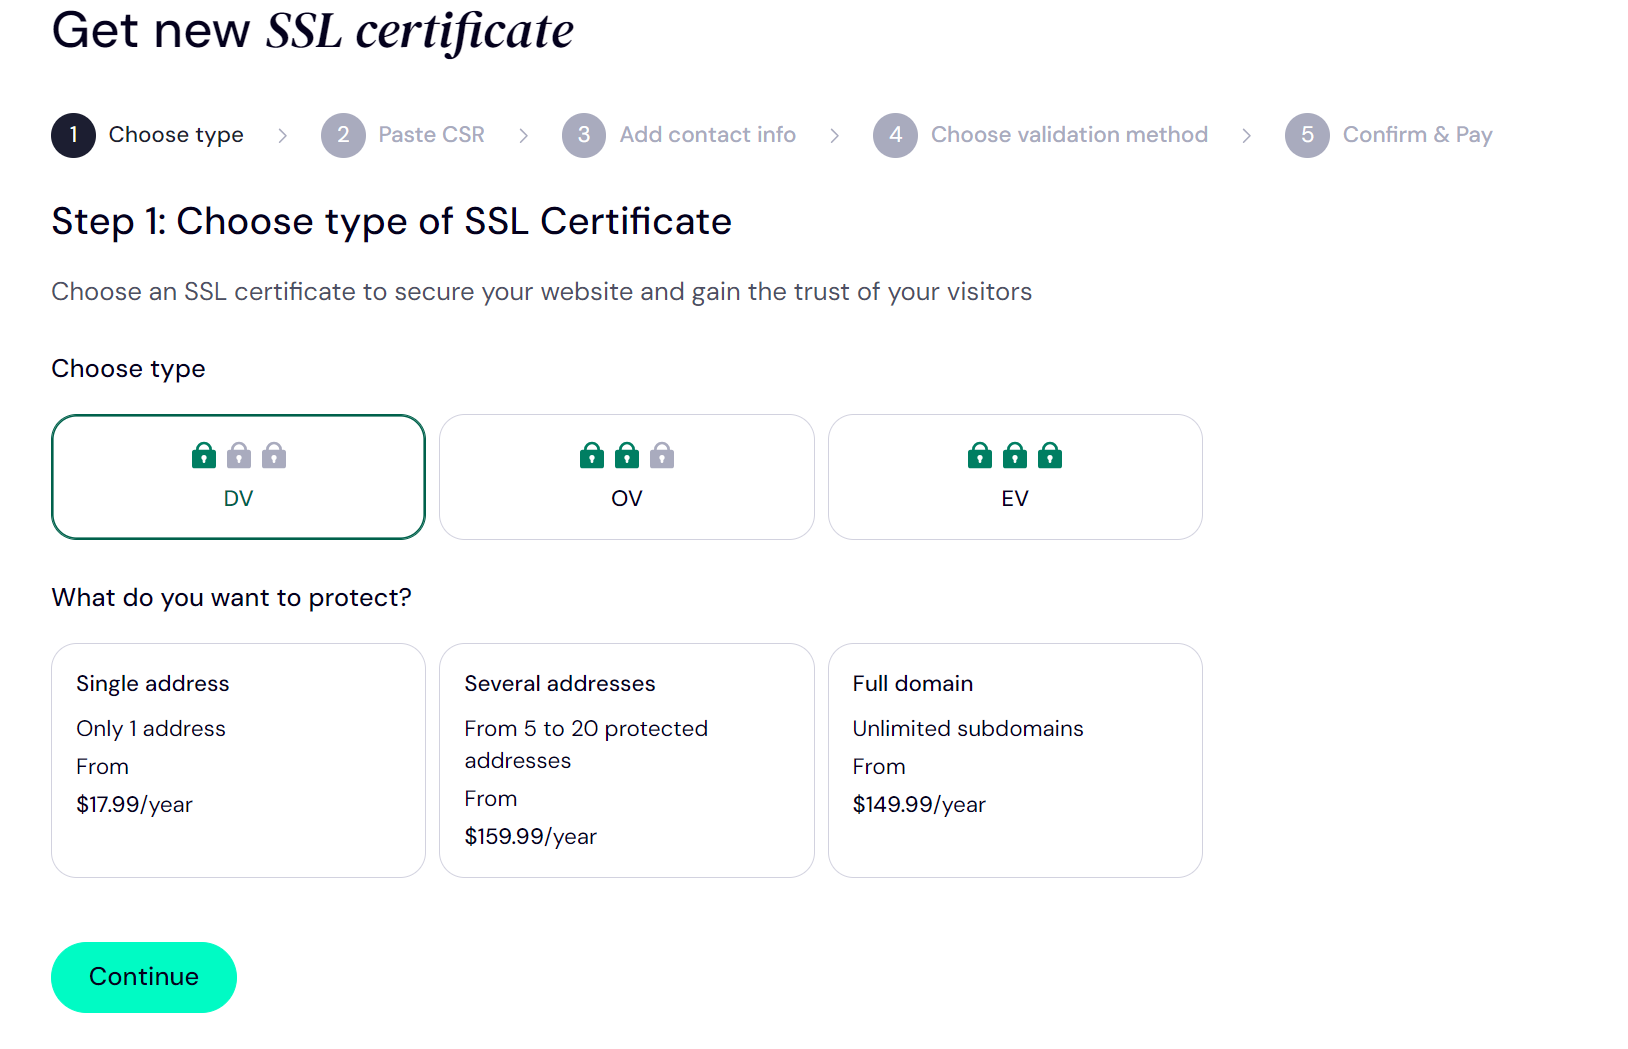
On the next page, click whether you want to protect a single website address, multiple domains, or a full domain (with subdomains).
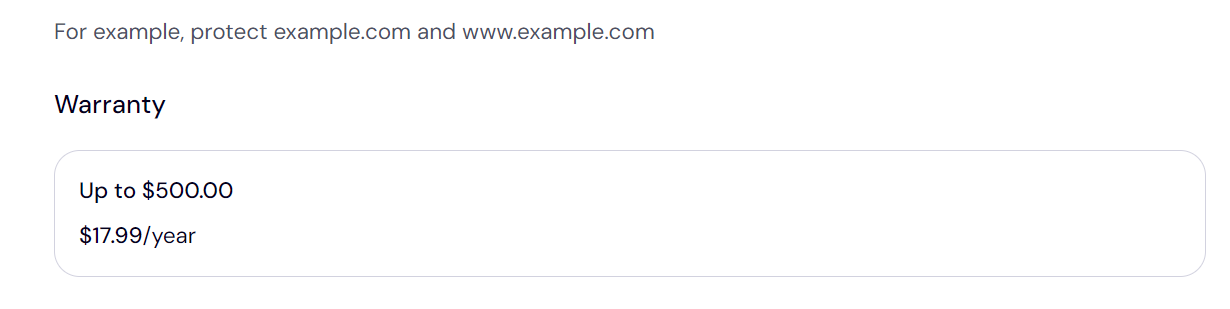
For each type of SSL certificate and domain coverage, you get a warranty.
Click 'Continue'.
- Next, paste your certificate signing request (CSR) into the required field.
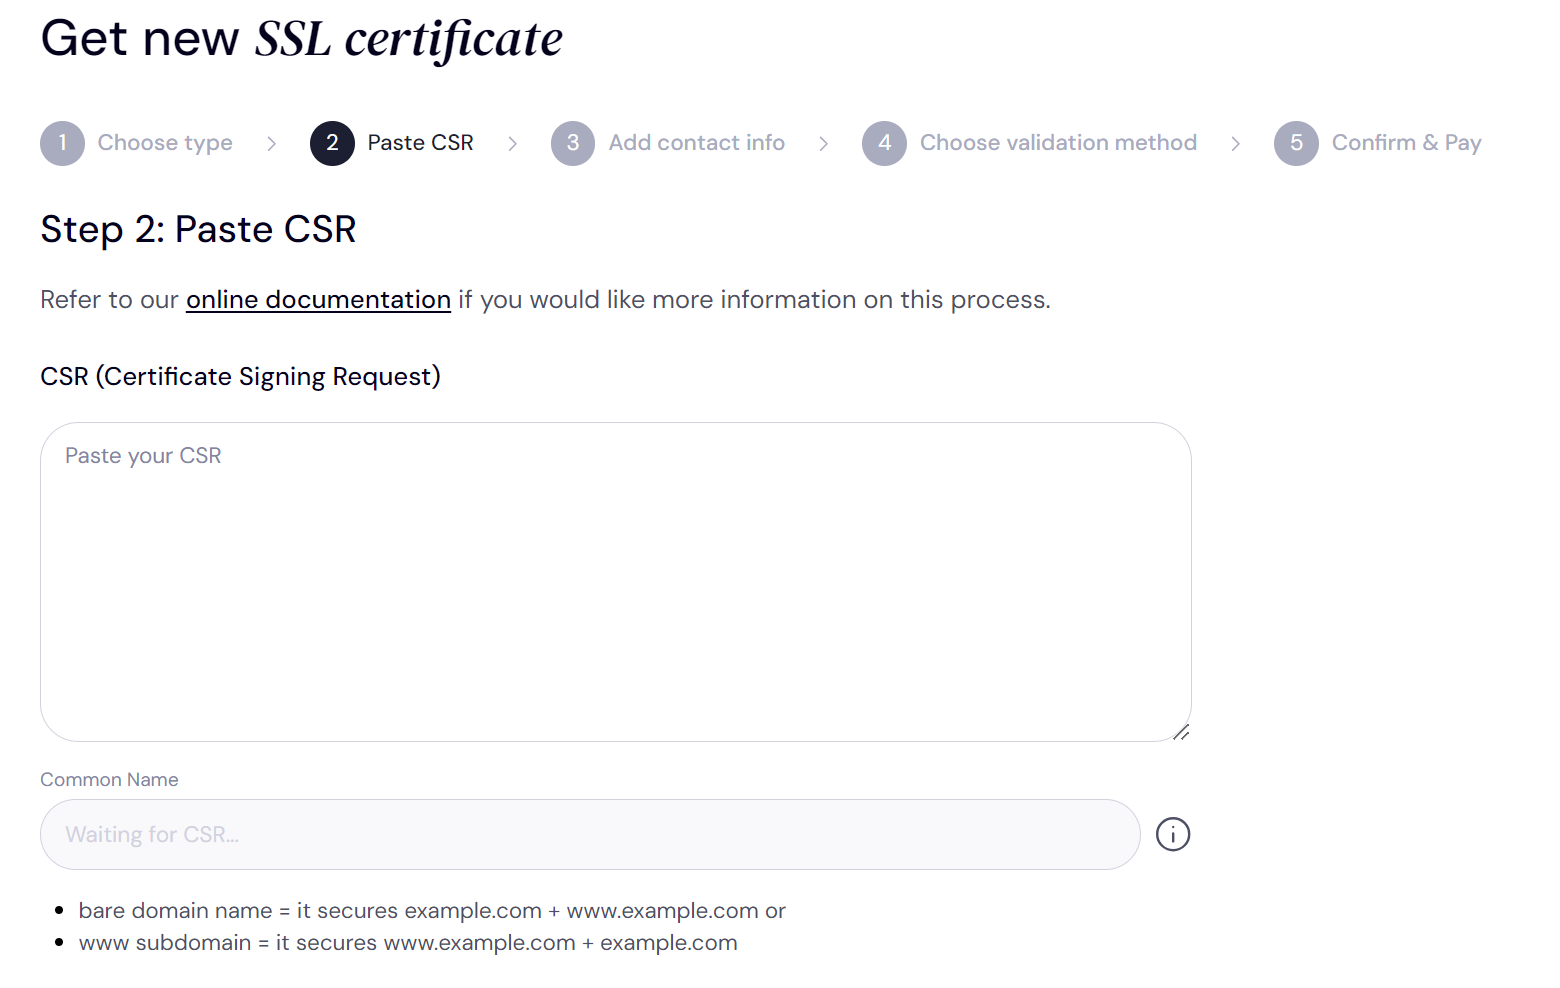
You can create a CSR easily from your control panel or using a CSR generator tool. For more details, check these resources:
[+] [List] Green Ordered Your CSR typically looks like this:
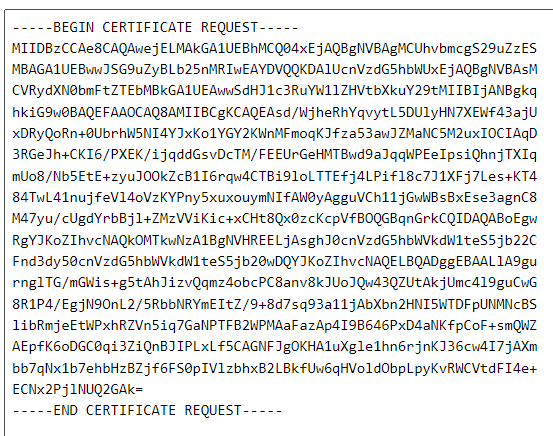
Our CSR portal will process your pasted CSR and retrieve the common name.
Next, choose the email where you'll receive the validation request and then the server type used to generate the CSR. For this demonstration, we'll use WHM/cPanel.
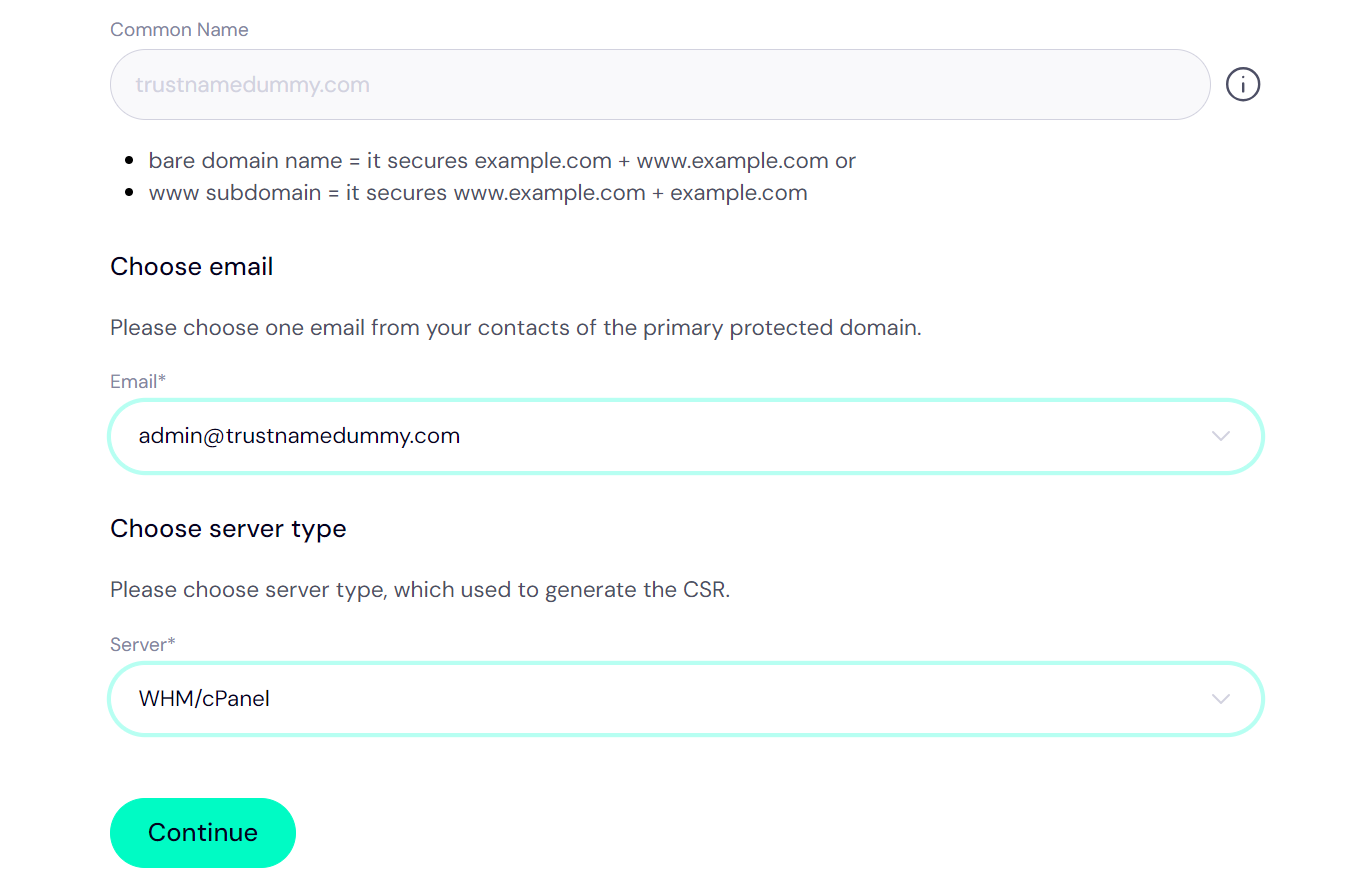
Click 'Continue'.
- Next, add your contact info. You can choose to add a new contact or use a pre-defined contact that's free and provided by Trustname to ensure your Whois privacy.
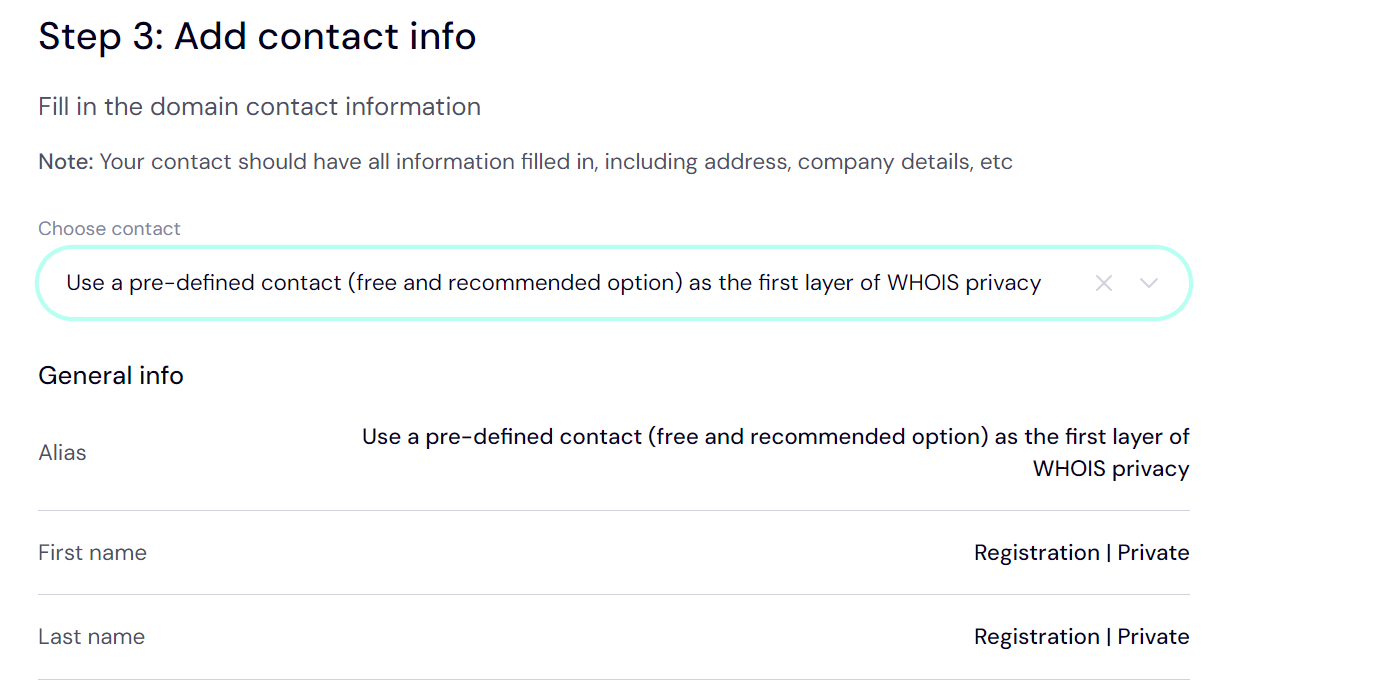
Click 'Continue'.
- Next, choose how you want to validate your ownership of the domain/identity. If you're buying a DV SSL certificate, you can choose: Domain, Email, or File verification.
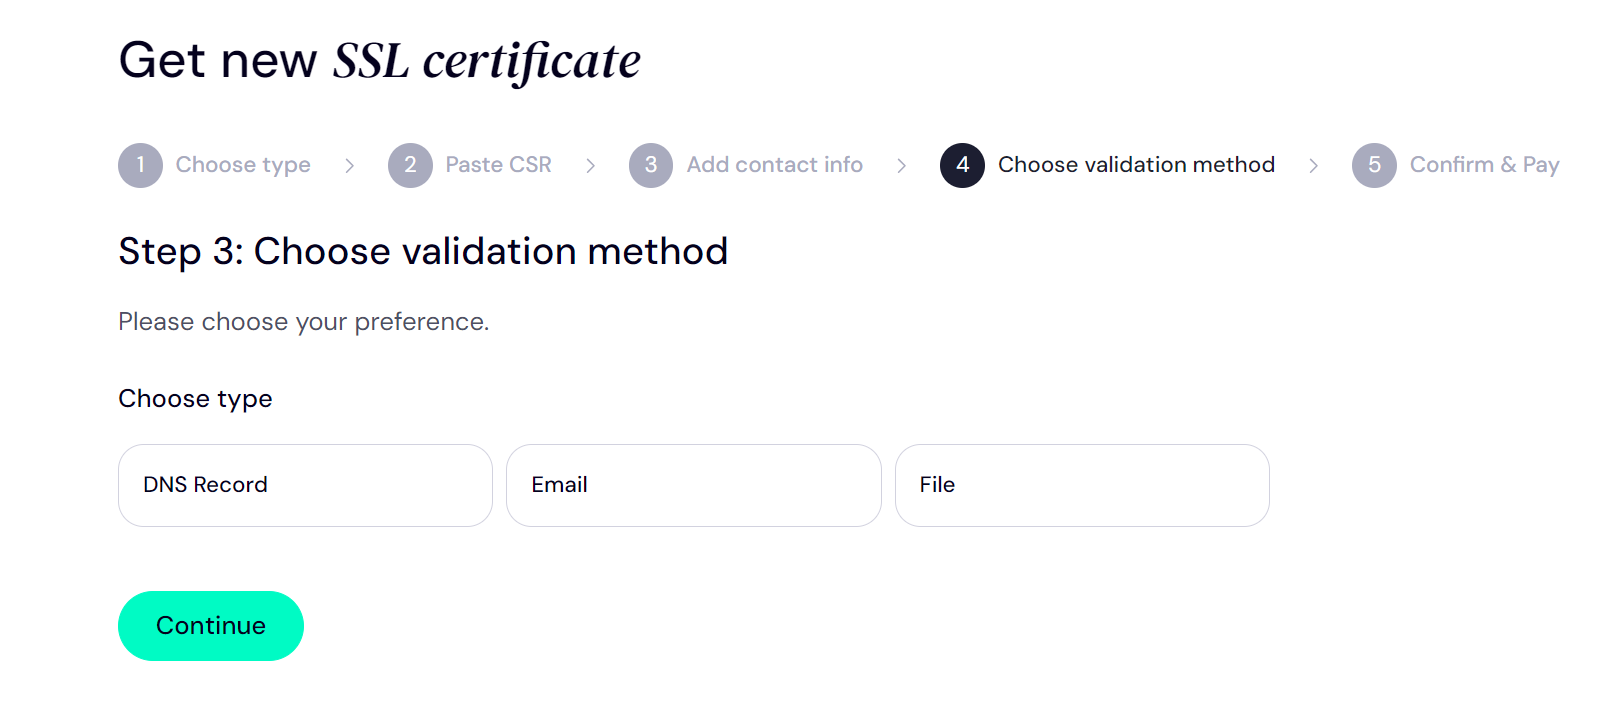
With domain verification, you'll only need to verify ownership of your domain by tweaking the DNS CNAME records.
With email verification, the issuing CA will send a verification email (aka DCV email) to you, including a unique link that you click to approve the certificate and validate your domain ownership.
With file verification, you will be required to upload a file to your web server at a particular location or directory to prove ownership of the domain and hosting.
- Next, fill in your billing address and payment details to purchase your SSL certificate.
If the billing address is the same as the details you added in the contact section, you can click 'Same as my contact address'.
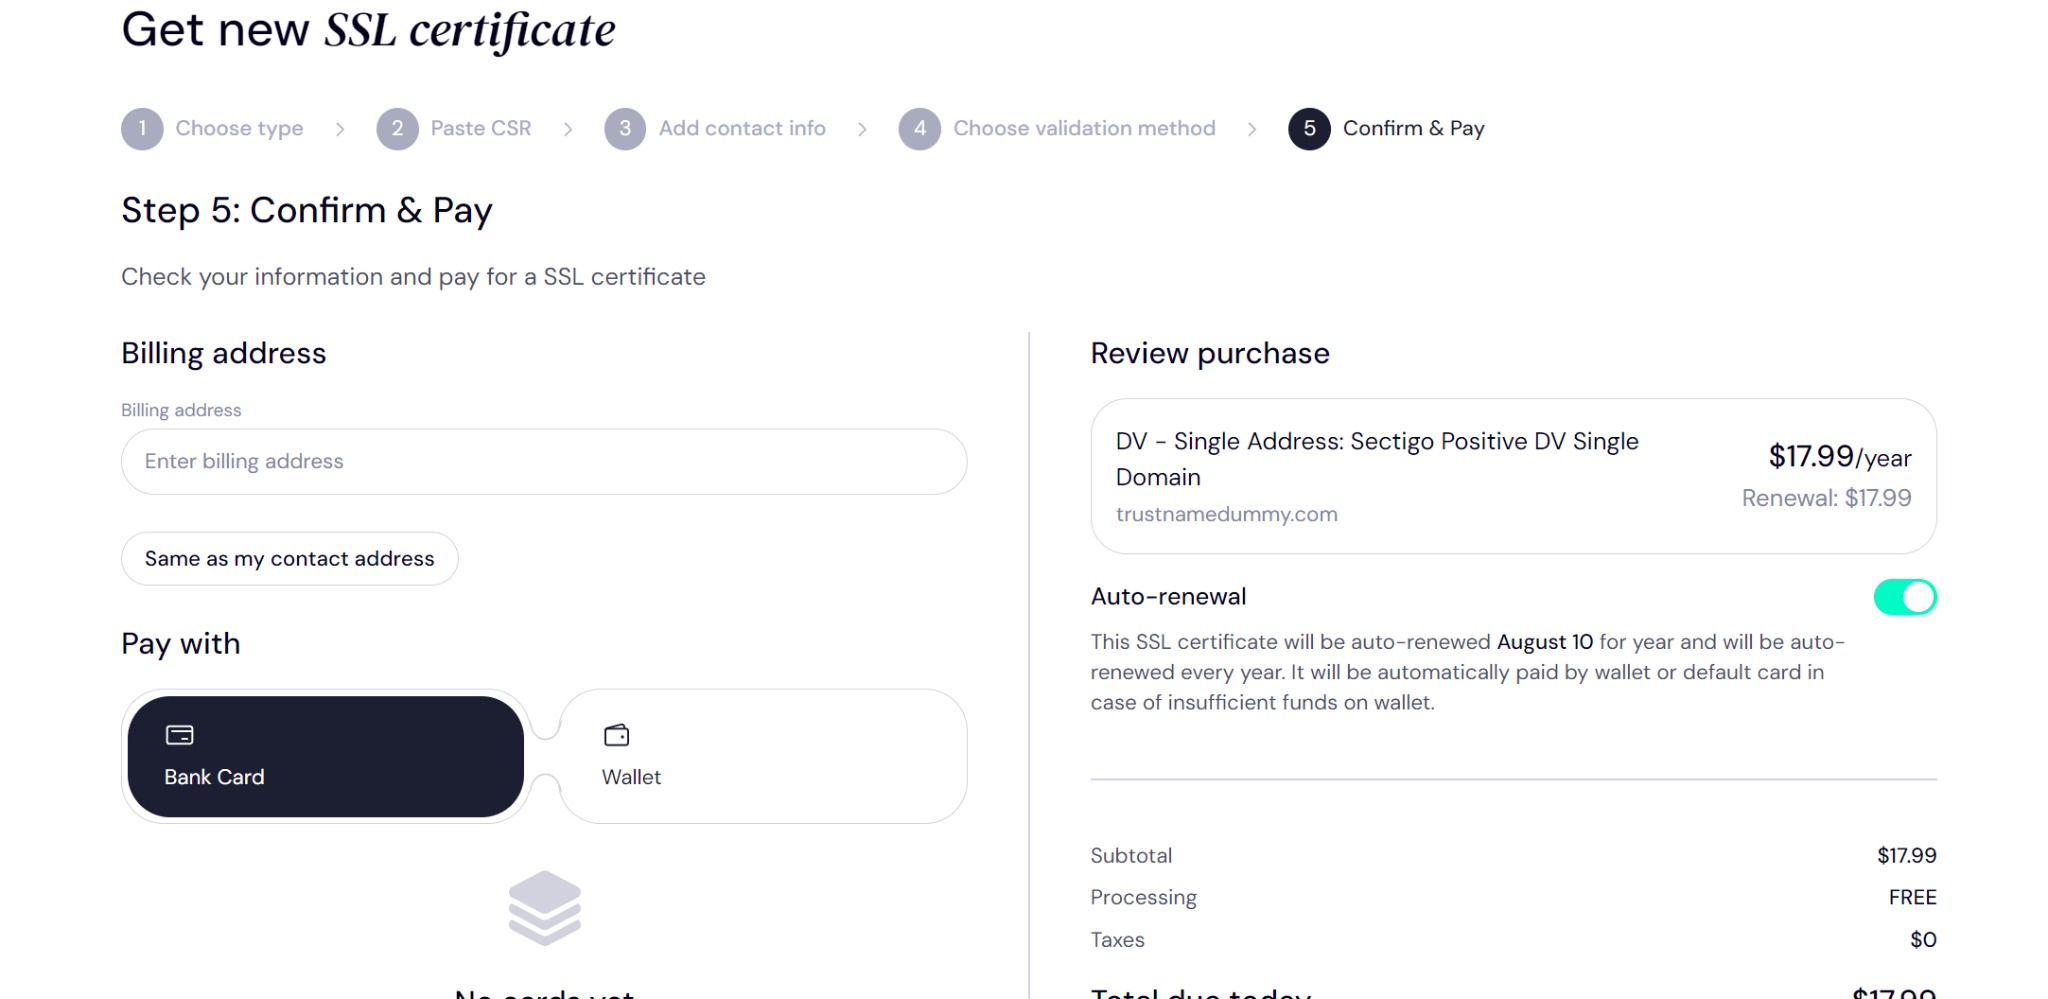
Next, fill in your card details. If you haven't set up a payment method yet, click on 'Add new card'.
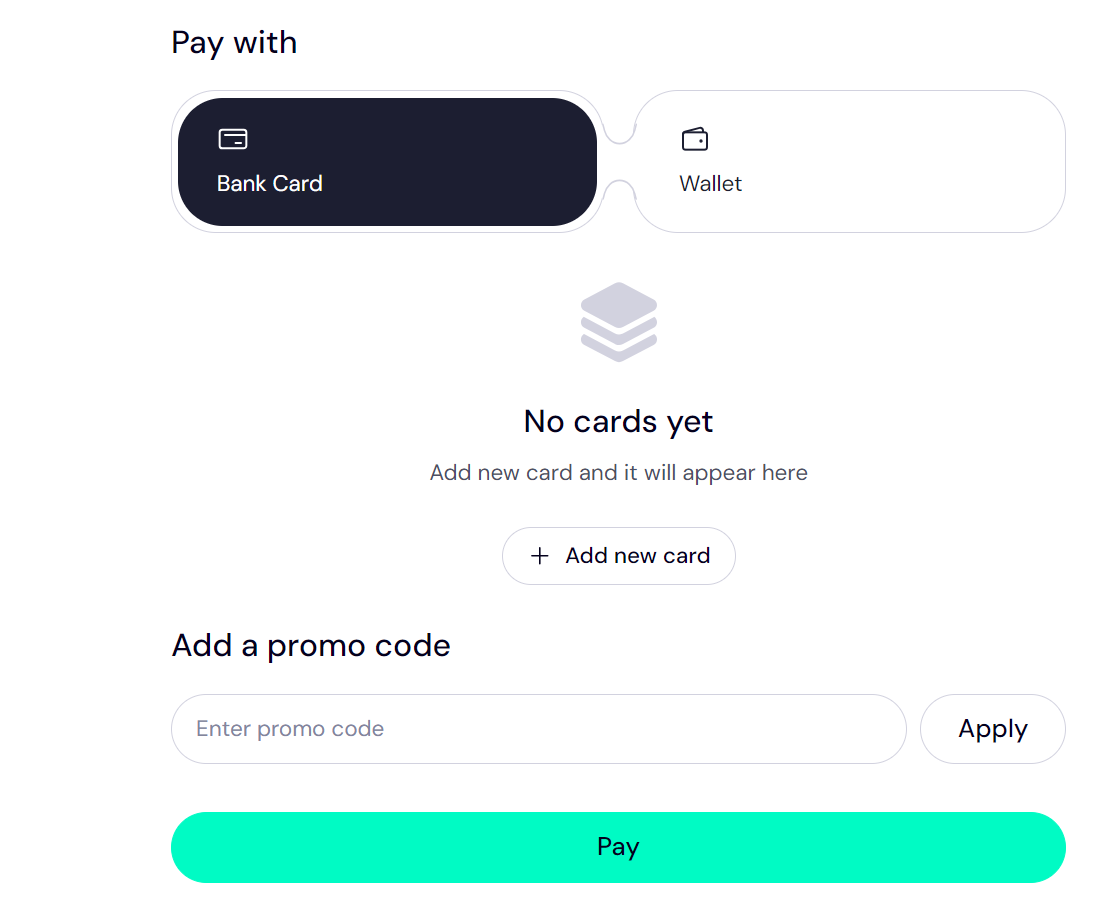
You'll then be redirected to the card setup page.
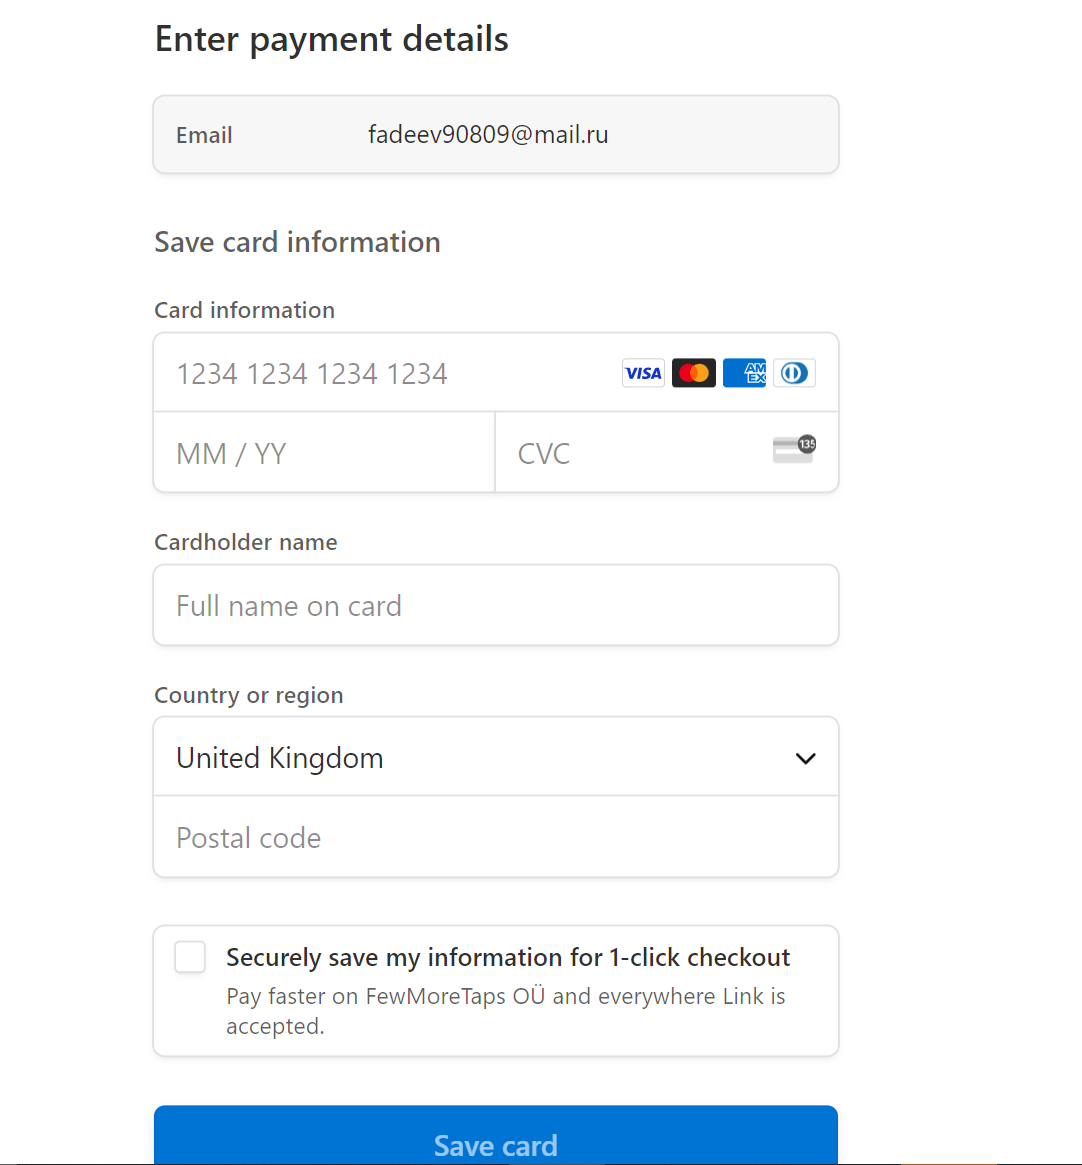
Fill in your card number, cardholder name, country, and postal code, and check the 'Securely save my information for 1-click checkout'.
Alternatively, you can click on 'Wallet' if you have funds in your Trustname wallet.
Review your purchase, and leave the 'Auto-renewal' dial on if you don't want the hassle of having to monitor your SSL certificate's renewal status.
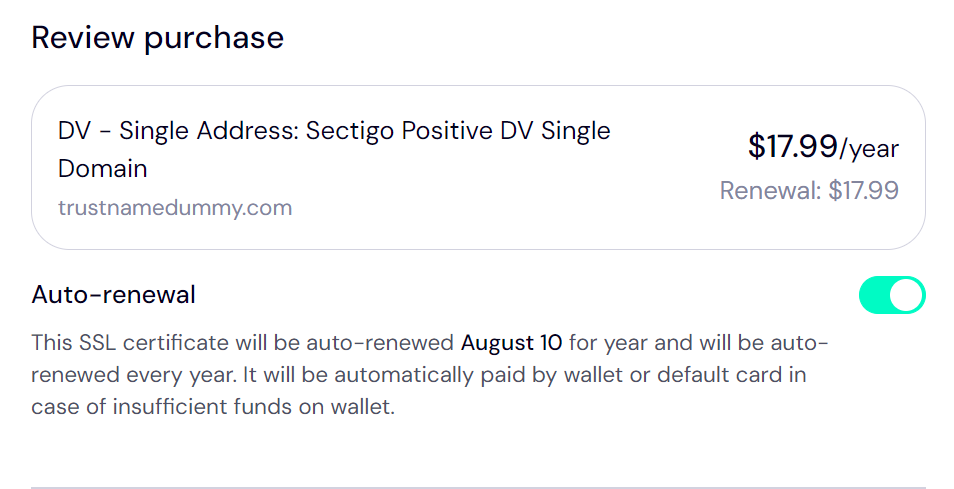
Click 'Pay'. And voila! That's it.
Depending on the issuing certificate authority and the validation method you choose, you'll be contacted to complete the process.
You'll also be instructed on where to install the SSL certificate (on your root server) once it's ready.
SSL Certificates Are Easy With Trustname
If you register your domain name with Trustname or transfer your domain name to Trustname, you won't have to generate a CSR - we'll do that for you.
Simply log in to your domain management account, choose the SSL certificate you want to upgrade to, give us a few details for validation, and wait while the certificate authority works on it. That's it!
Was this article helpful?
That’s Great!
Thank you for your feedback
Sorry! We couldn't be helpful
Thank you for your feedback
Feedback sent
We appreciate your effort and will try to fix the article